สำหรับคนที่ลงแบบล้างเครื่อง (Clean Installation)
1. สร้าง Registry ก่อน
หลังจากที่เราสร้างตัวติดตั้งลง USB เรียบร้อย (ใครยังไม่สร้างไปดาวน์โหลดได้ที่ ลิ้งก์นี้ ไม่ว่าจะสร้างด้วย ตัวเลือกที่ 2 Creating Tool หรือตัวเลือกที่ 3 ใช้ Rufus ร่วมกับไฟล์ ISO) ให้เราเข้า Windows 10 เปิด Notepad ขึ้นมา แล้วก็อปข้อความด้านล่างนี้ จากนั้นเซฟไฟล์ชื่อ bypass.reg
Windows Registry Editor Version 5.00
[HKEY_LOCAL_MACHINE\SYSTEM\Setup\LabConfig]
“BypassTPMCheck”=dword:00000001
“BypassSecureBootCheck”=dword:00000001
“BypassRAMCheck”=dword:00000001
“BypassStorageCheck”=dword:00000001
“BypassCPUCheck”=dword:00000001

จากนั้นนำไฟล์ไปใส่ไว้ใน USB ที่เราจะใช้เป็นตัวลง Windows 11 ** ย้ำว่าให้เซฟชื่อ bypass.reg ไม่ใช่ bypass.reg.txt นะ
2. ทำการติดตั้ง Windows 11


////////////////////////////////////////////////////////////


ขอขอบคุณข้อมูลจาก https://www.techpowerup.com/287584/windows-11-tpm-requirement-bypass-it-in-5-minutes
/////////////////////////////////////////////////////////////////

How to Install Windows 11 without Microsoft Account
As is known to all, when you install Windows 11 in the computer, you will be asked to sign in Microsoft account to set up Windows 11. What if you do not want to use Windows 11 with the Microsoft account? Is it possible to bypass Microsoft account to install Windows 11? You can get the effective tricks in this article.
- Tricks 1: Disconnect the internet to set up Windows 11 without Microsoft account
- Tricks 2: Use Windows 11 with Offline account in Windows 11 Pro Edition
- Tricks 3: Bypass Windows 11 Microsoft Account via taskmgr Commands
- Tricks 4: Install Windows 11 with local account using OOBE \BYPASSNRO command
Tricks 1: Disconnect the internet to set up Windows 11 without Microsoft account
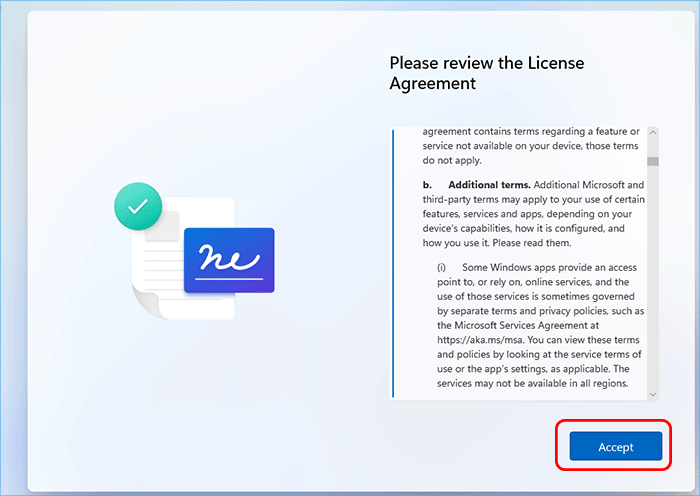
If you are going to clean install Windows 11 on your computer, you will be asked to connect the internet and check for the updates. After that, you can manually disconnect the network connection or plug out the Ethernet cable. At this time, there is no network connection and you can accept the license agreement to set up your Windows 11 device using the local account.
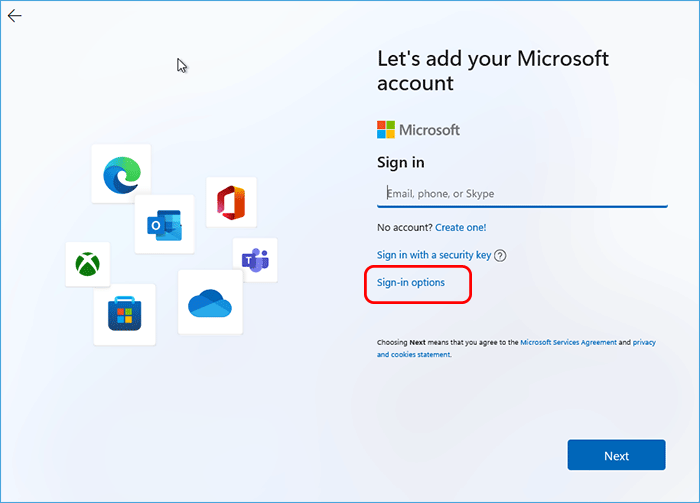
Tricks 2: Use Windows 11 with Offline account in Windows 11 Pro Edition
If you are going to install Windows 11 Pro or higher version, you can directly change the sign in option to offline account. In this way, it is no need to use your Microsoft account to set up Windows 11.
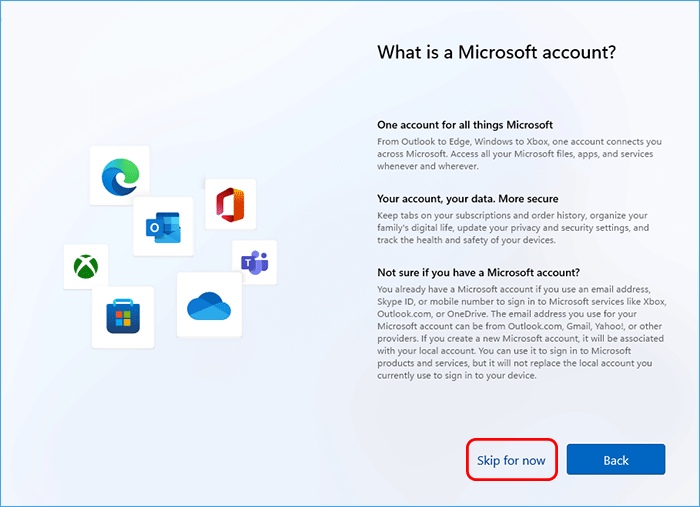
Step 1: Finish the Windows 11 configuration until it asks you to add Microsoft account. While you are on adding Microsoft account window, click Sign-in option.
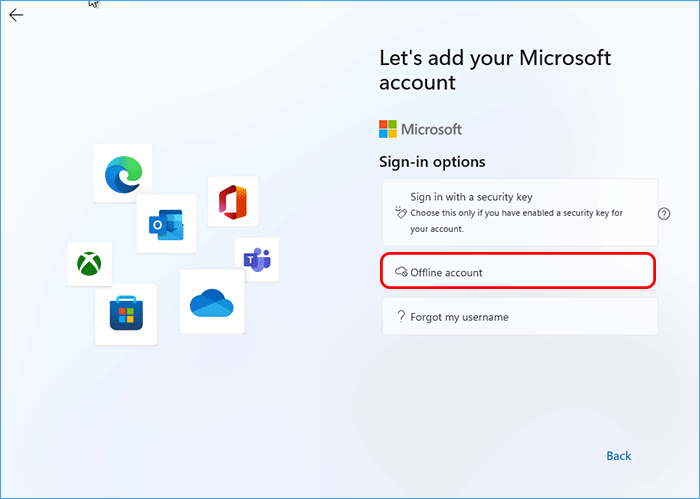
Step 2: Now, choose Offline account.
Step 3: Click Skip for now to continue.
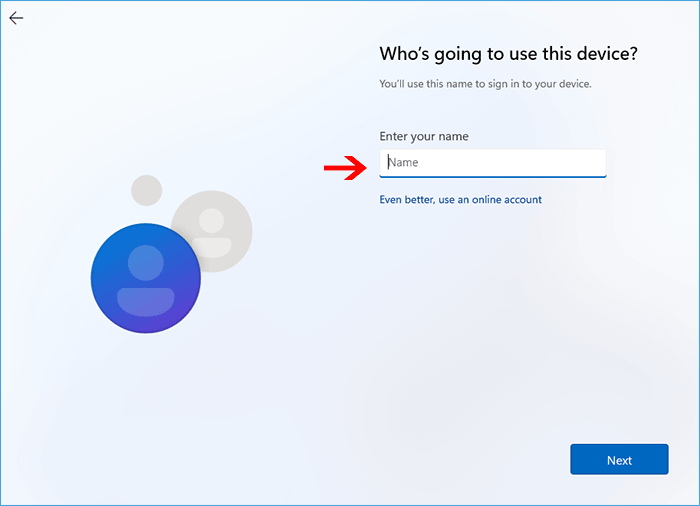
Step 4: Then install the Windows 11 with the local account by following the wizard.
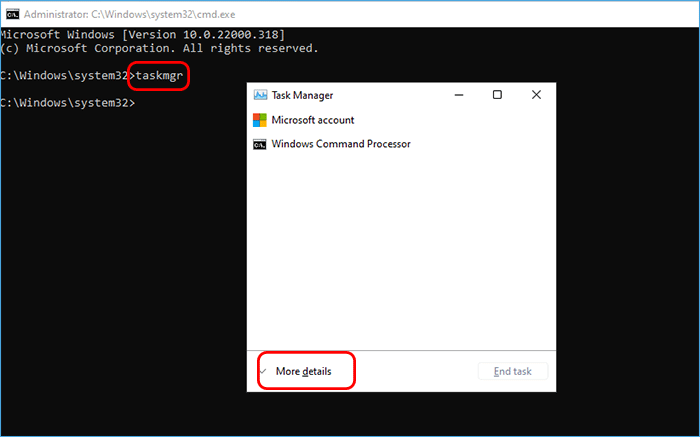
Tricks 3: Bypass Windows 11 Microsoft Account via taskmgr Commands
The taskmgr command can help you to open Task Manager so that you can end Network collection flow process to bypass Microsoft account requirement in Windows 11 Home edition.
Step 1: Start the computer and follow the initial steps to configure the country and keyboard.
Step 2: When it asks you to connect the Internet, you can press Shift + F10 keys on the keyboard to open Command Prompt.
Step 3: Execute the command: taskmgr to open Task Manager.
Step 4: Hit More Details on the Windows to check details on the processes running inside your computer.
Step 5: Go to find and select Network Connection Flow. After that, click on End task button on the bottom right.
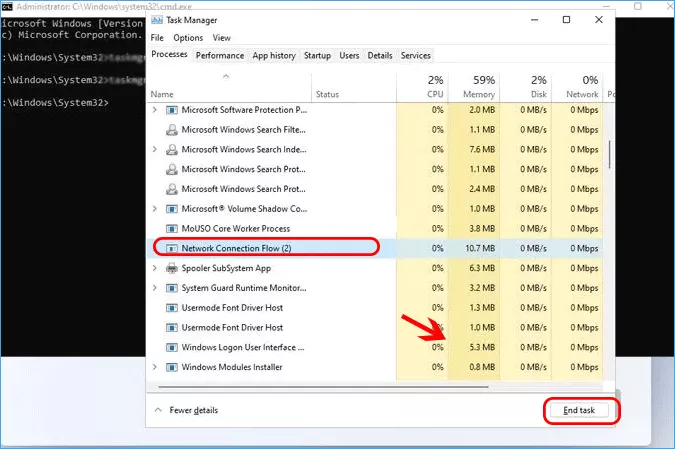
Step 6: Shut down Task Manager and Command Prompt. Then you can go back to Windows 11 setup page. It will ask you to enter the local account to sign in this computer. After that, you can follow the wizard to set up Windows 11 with local account.
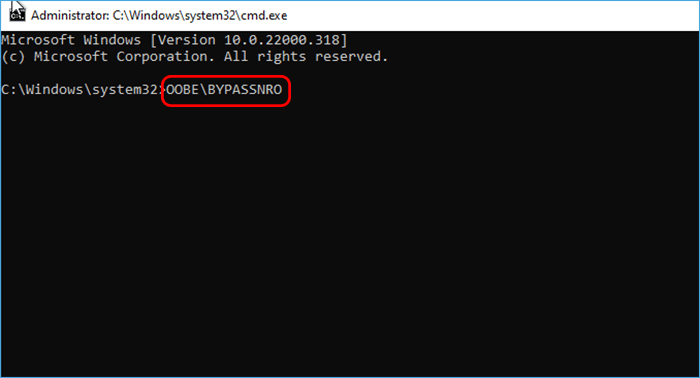
Tricks 4: Install Windows 11 with local account using OOBE \BYPASSNRO command
By using OOBE \BYPASSNRO command, you can install Windows 11 Home edition with limited setup.
Step 1: During the Windows 11 installation process, you can press Shift + 10 to open CMD on the screen which asks you to connect to an internet source.
Step 2: Type-in the command: OOBE\BYPASSNRO and press the Enter key.
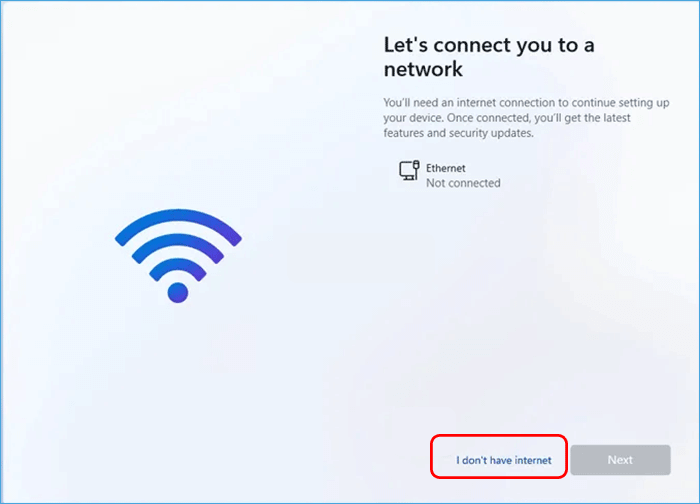
Step 3: Then your computer will restart and the same installation wizard comes. You can find and hit the option—I don’t have internet.
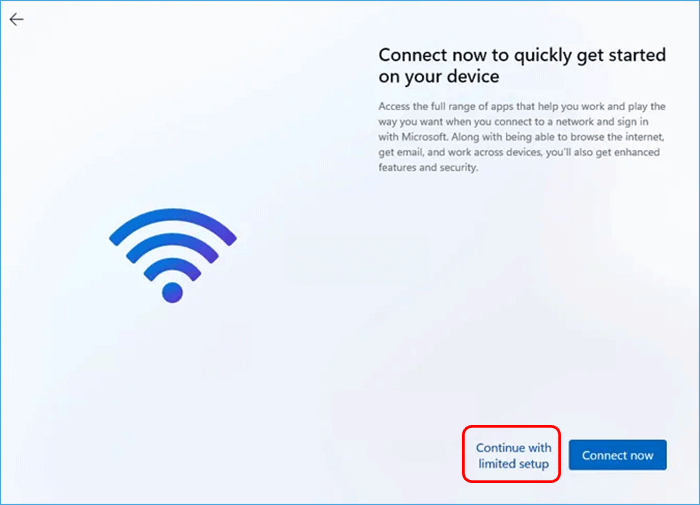
Step 4: Next, click Continue with limited setup option.
Step 5: Enter the local account information to proceed. Then you can continue with the configuration to install Windows 11 on your PC.
Related Articles:
https://www.isunshare.com/windows-11/how-to-install-windows-11-without-microsoft-account.html

ใส่ความเห็น